How to Repair a Leaking Film Developing Tank
If you’re a photographer, you know that developing tanks are essential for processing film. But what happens when your developing tank starts to leak? Don’t worry, it seems to be a common problem, and you can fix it yourself with a few simple steps.
Here’s what you’ll need:
- A leaking developing tank
- Silicone sealant
- Masking tape
- Water and washing liquid solution in small cup
- A clean cloth
Instructions:
- Clean the developing tank thoroughly.
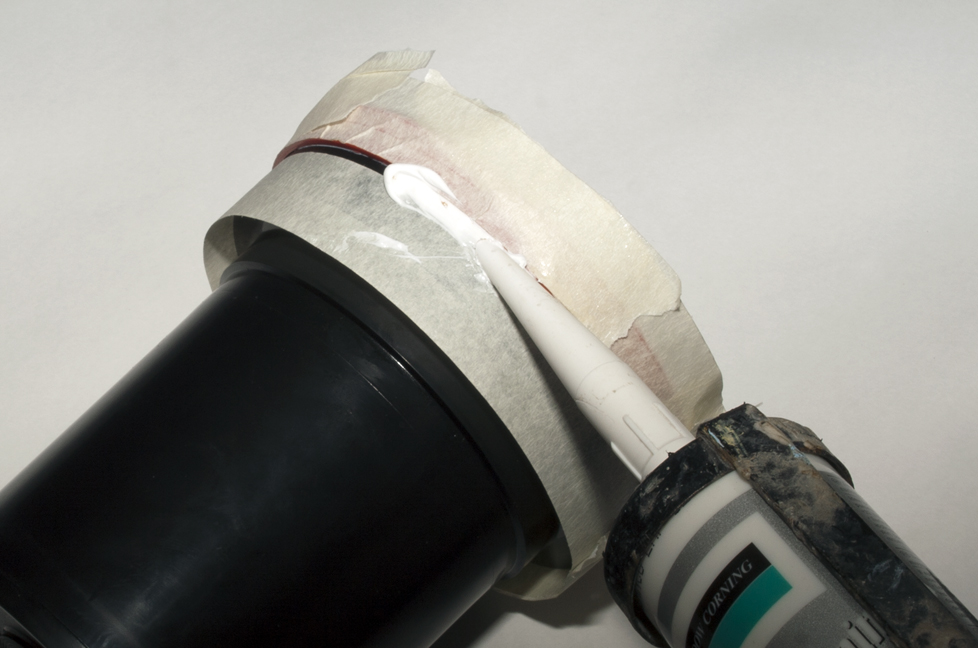
- Apply a strip of masking tape along the bottom of the red band on the developing tank.
- Apply another strip of masking tape about 5mm below the red band.
- Squeeze a bead of silicone sealant in between the two strips of masking tape.
- Smooth out the bead of silicone sealant with a wet finger dipped in water and washing liquid solution.
- Allow the silicone sealant to dry completely.
Once the silicone sealant has dried, your developing tank will be leak-proof. You can now use it to develop film without worry.


Here are some additional tips for repairing a leaking developing tank:
- Make sure the developing tank is clean before you start. Any dirt or debris can interfere with the bonding of the silicone sealant.
- Apply the silicone sealant evenly. A thick bead of silicone sealant will take longer to dry and may not be as effective as a thin bead.
- Smooth out the silicone sealant with your finger. This will help to create a smooth, even surface that will be less likely to leak.
- Allow the silicone sealant to dry completely before using the developing tank. This will ensure that the sealant is fully cured and that the developing tank is leak-proof.
By following these simple steps, you can easily repair a leaking developing tank and get back to developing film.