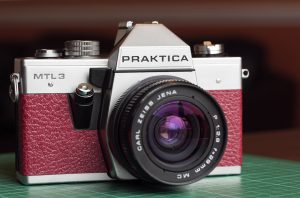
How re-skinning a Praktica MTL3 SLR film camera in a luxurious camera leather can be both rewarding and a great upgrade. The Praktica MTL3 and MTL5 early models are both very easy cameras to re-skin. Earlier models didn’t have a self timer to cut out and the old skins lift very easy. Before we delve into the steps involved please do follow the instructions carefully. Take great care as you go, knives are sharp and cleaning products can do damage as well as clean. Like other online tutorial websites a disclaimer to take notice of; Milliy’s Cameras can and will not be held responsible for any accidents or damages to persons or goods, to follow this tutorial is at your own risk. To undertake this tutorial is acceptance of Milly’s Cameras disclaimer.
Time To Complete: 25 minutes
Tools and Materials List;
- Camera Leather Sheet 0.5mm thick
- Sharp Knife, Steel Ruler and Cutting Mat
- Double Sided Tape 50mm wide
- Window Cleaner or Lighter Fluid, (Highly Flammable so please take care).
- Clean cloth
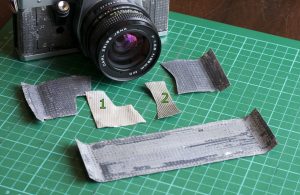
The first task is to remove the old covers. An easy way to do this would be to gently lift one corner of the old skins and then peel. Being careful not to stretch the cover as you pull. Stretched skins as a cutting template later for the new covers will not produce great looking replacement covers. Take your time and be gentle with them. The front covers have a thin sliver of metal which packs out a step in the body, see photos to the right, No. 1 and 2. Most of the time these come off with the skin, usually stuck to the adhesive side. Gently peel them off and place them to one side. We will need these for later and replaced using double sided tape to do so.
Once the skins are all removed the next step is to clean all the old adhesive off the camera body. The old adhesive on some camera models can be easily done by rubbing with a finger. The friction from rubbing helps the adhesive to roll off. I have had a couple stubborn cameras where a cleaning product was needed. For this purpose I find petrol lighter fluid, (naphtha) to be an asset. I do have some customers who tell me they use a window cleaner like Windex. I have yet to try this. Windex would be the safest out of the two to use as great care has to be taken because of the flammability of naphtha.
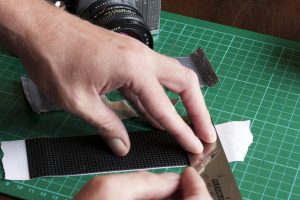
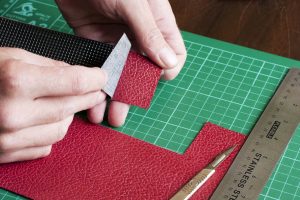
Once the camera is clean start to apply double sided tape to the back of the old covers. Use a knife to trim the edges before removing the backing. As seen in the photo to the right. –>
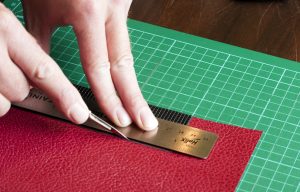
After removing the double sided tape backing and before placing the old cover down on the leather sheet. I place them with adhesive side down on my jumper, t-shirt or jeans. This is to pick up small fibers and make the adhesive less sticky. This will help us to part from the leather after cutting the new covers. Once you have done this you can place the cover down on to the leather for cutting around.Before cutting make sure you have a new blade in your knife, a sharp blade produces clean cuts and a reduction in mistakes.
Cut all of the skins needed before fitting and take your time. Once completed remove the old skins from the newly cut leather skins. Fitting the new skins is a slight art and the best way I’ve found to do this. Would be, remove the adhesive protection backing using the blade of the knife to separate. This can be a fiddly job so take your time and if it don’t want to separate move to a different corner and try again.
I tend to start with the rear panel and then move on to the front panels. Now starting at the hinge, lay the rear panel so that it is level and aligned correctly. As you lay it, begin to smooth it out also. Starting at the hinge and rubbing away to the other end of the door catch. The idea here is to not get any trapped air which will cause air bubbles. The adhesive on Milly’s Cameras leather is formulated to form a strong bond under pressure. Pressure applied to the surface, so that the harder you push the better it will bond. Care is taken to not damage your camera by pushing too hard in a sensitive area. One time I accidentally pushed my finger through a film view window. Luckily I only make such mistakes once before learning to take more care and less haste.
Moving on to the front covers again remove the backing paper first with a blade. Like old postage stamps, the best way to lay the front skins would be to lick the adhesive. Just a centimeter or two on the edge. The edge that will but up to the lens mount housing. This will temporarily deactivate the adhesive so you can slide it in to the correct position. The adhesive is non toxic so your tongue won’t fall off or develop any oddities. Once in place begin doing the same as the rear panel, gently lay and rub outwards to the side of the camera. The part you licked will take about 15 to 20 minutes to dry and can be pushed down to adhere to the body once this time has passed. Finishing both of the front panels your of your camera should now look like mine in the photographs below. Below sporting their new camera leather. Please note that I have many camera leather and leatherette available to choose from so you don’t have to go with burgundy as I did. The choice is yours to make. Have fun!

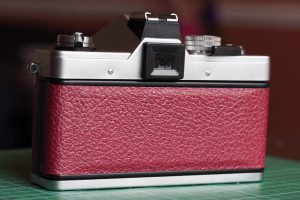
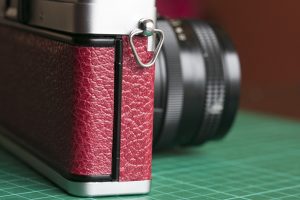
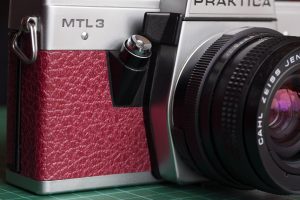


Another accurate method, particularly if original leatherette is missing, damaged or stretched/distorted, is to make your own template using low-tack painter’s masking tape.
Some are simply too low-tack however, and fail to stick around curves etc so, the one I prefer and use all the time is, Scotch 3434 by 3M and is Blue in colour. This can be relied upon to follow any curves or ridges on a camera body and importantly, despite adhering quite firmly, can easily be removed without leaving any residue. Brilliant stuff!
This tape is available in various widths but I tend to use only the 25mm (1″) size, overlapping each strip by about 4mm when applying to the camera. This method is really quite easy to master and the tape is easy to cut or trim with scissors or a sharp scalpel blade.
Simply cover the entire area of each of those on the camera requiring new leatherette. Once completed, use your scalpel to gently lift one corner and gently and slowly, peel your new template away from the camera body, being careful to keep the overlapped strips of tape forming your template, together.
This highly accurate template can then be placed directly onto your sheet of new leatherette (face side up)*, gently smoothing it down to lay flat before cutting around it to create your new coverings.
*Don’t worry about your new leatherette when sticking it to the face side of your new leatherette; this tape won’t harm it at all. In fact, I also use this tape for cleaning the leatherette on my old cameras. Simply place it on the old/dirty leatherette, rub down quite firmly and then peel it off, taking all the dirt with it as you do. It works a treat! Just make sure your old covering is firm before trying this for, if it’s loose, it will lift off with the tape as you peel it off!
Try it. It works!
Thank you David for taking the time to stop by, great advice here that does indeed work well.
All the best
Milly’s Cameras